
- Chamomile Rake | Rust Prevention & Removal | Tech Sheet (PDF)
- Highbush Blueberry Rake | Maintenance, Rust Prevention & Removal | Tech Sheet (PDF)
- Baby Leaf Harvester | Instructions for Safety, Assembly, Operation & Maintenance | Tech Sheet (PDF)
- Carrot Growing Guide | Carrot Harvesting, Handling & Storage - Part 3
- CoolBot–Air Conditioner Compatibility | Use, Temperature, Cooler Size & Insulation + Brand Recommendations | Tech Sheet (PDF)
- CoolBot | How to Build a Walk-in Cooler for Your Small Farm (PDF)
- CoolBot | Instruction Manual & Troubleshooting Guide (PDF)
- CoolBot Pro | Quick-Start Guide (PDF)
- CoolBot Pro | Spec Sheet (PDF)
- Cut-Flower Harvesting & Post-Harvest Care | Best Practices from Pros in the Slow Flower Community
- Getting Started with Value-Added Foods & Farm Goods
- Cooling & Storing Chart for Freshly-Harvested Summer Produce
- Salanova Lettuce | Cutter Tool | Tech Sheet (PDF)
- Classic Storage Crops | Post-Harvest Handling & Storage Guidelines
- Video: CoolBot® | Installation Instructions & Recommendations
- Video: CoolBot PRO | Installation Instructions & Recommendations
- Video: Sauce Master II Fruit & Vegetable Strainer | Quick Demo
- Video: Using Blanching Caps to Blanch Frisée (Chicory) in the Field at Satur Farms
- Video: CoolBot PRO | Tutorial with Jean-Martin Fortier
- Video: The Procona System for All-in-one Flower Harvest, Transport & Display
- Video: Baby Leaf Harvester for Greens, Mesclun, Spinach, Lettuces & Tender Aromatics
- Video: Gorilla Tubs® (formerly known as TubTrugs®)
- Video: Johnny's Harvest Knives, Machetes, and Shears
- How to Set up a Winter Cool Room | CoolBot® + Inkbird + Space Heater
- Chrysal Professional 1 Hydration Solution | SDS
- Chrysal Professional 2 Transport & Display T-Bag | SDS
- Chrysal Classic Professional 2 Transport & Display (Holding) Solution | SDS
- Chrysal Professional 3 Vase Solution Powder | SDS
- Chrysal Clear Bulb T-Bag | Cut-Flower Conditioner | SDS
- Chrysal CVBN Flower Conditioner | SDS
- Chrysal Clear Universal Flower Conditioner | SDS
- Video: Tips & Recommendations for Dried Flowers • Tutorial with Joy Longfellow
- Chrysal Clear Bulb Flower Conditioner | SDS
- Video: Choosing & Growing Paste Tomatoes for Sauce-Making • with Niki Jabbour
How to Set up a Winter Cool Room
CoolBot® + Inkbird + Space Heater = 21st-Century Root Cellar
Come winter, many small-scale farmers and growers find they surely could use more storage space for keeping things cool but not frozen.
The following system will handle the cool storage needs of a range of perishables: maximizing shelf life of traditional fall-harvested root crops; prechilling spring-flowering bulbs such as tulips and narcissus; overwintering tender perennials such as begonia, dahlia, and gladiolus; forcing Belgian endive… You may find surprising the many functions your winter cool room can serve.
Winter Goal: Keeping Perishables Cool… Not Frozen
A Coolbot is one of the gadgets you will need to set up your cool room.
Here are some directions for setting up a CoolBot walk-in cooler for your small farm.
If you lack a traditional root cellar, you can set up a walk-in cooler with a CoolBot, then regulate temperatures inside your cooler using add-on controllers as outdoor temperatures fall below freezing point.
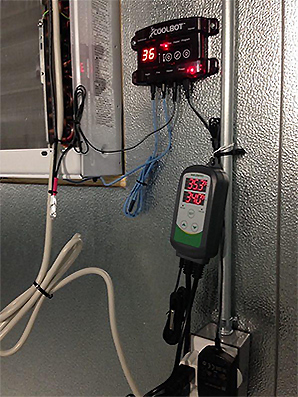
3 Components to the System
First, you'll want to have the walk-in cooler set up with the CoolBot in a suitable space. Once you have your CoolBot cooler set up, you're ready to add the other 2 components to attain the goal for winter: to maintain temperatures inside the cooler above freezing but below the set-point of the CoolBot. You can accomplish this by connecting a thermostat-controlled extension cord to any small space heater of the conventional type—NOT a radiant type. (Some suitable options are listed below.) The big advantage to this system over a traditional root cellar is that you can more accurately dial in and maintain the temperature requisite to your purpose.
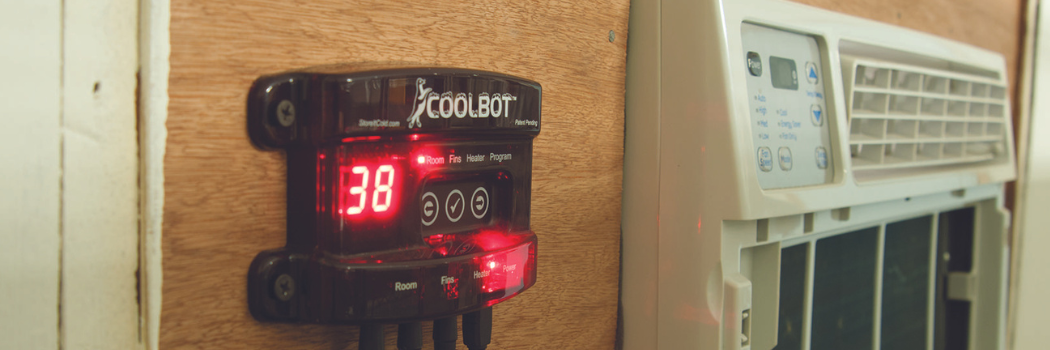
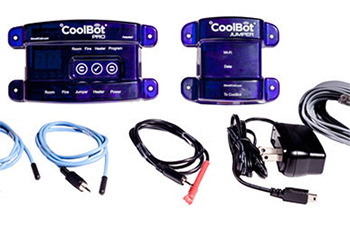
- CoolBot: A device that uses multiple sensors and a programmed microcontroller, attached to a standard, off-the-rack digital air conditioner, to functionally replicate a more costly, conventional walk-in cooling system. We offer two models:
- Recommended pass-through thermostats:
- Examples of convection/ceramic space heaters:
Step-by-Step Set-up
Here's how to set up your devices to keep your walk-in cooler above freezing during the coldest months of the year, between 32°F/0°C and your set temperature on the CoolBot.
- To set up your cooler for different temperatures, make certain that there is a difference of at least 4°F in-between the set temperature of the Inkbird and the set temperature of your CoolBot, so they don't overlap and work against one another.
- Keep the air conditioner and CoolBot set-up you normally use and keep them both plugged in.
- Plug in the Inkbird Temperature controller.
- The out-of the box temperature scale of the Inkbird will be in Celsius. Follow the instructions in the Inkbird manual to change it to Fahrenheit scale, if needed.
- Place the Inkbird Temperature Sensor as close to the CoolBot ROOM sensor as possible. Wait a few minutes for them to adjust to the temperature.
- If your Inkbird Temperature display (the number at the top — labeled PV) is different from the one displaying on the CoolBot, adjust the Temperature Calibration (CA) of the Inkbird sensor by following the instructions on the Inkbird manual. The objective is to have both sensors reading almost the same temperature (within 1°F is fine).
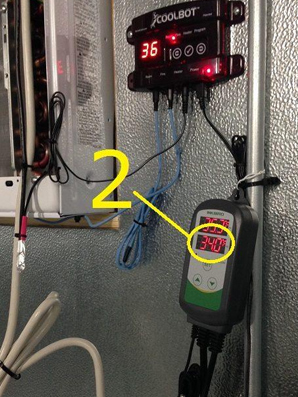
- Adjust the Setting Value (SV) temperature on your Inkbird to 34°F/1.1°C, following the instructions in the Inkbird manual.
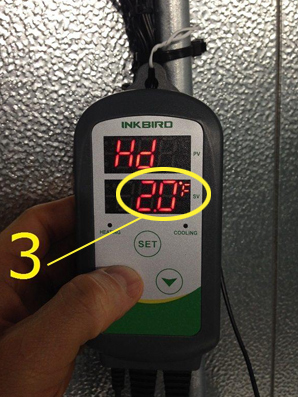
- Adjust the Heating Differential (Hd) value on the Inkbird to 2°F/1°C, following the instructions on the Inkbird manual.
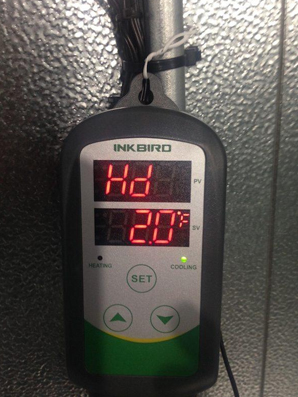
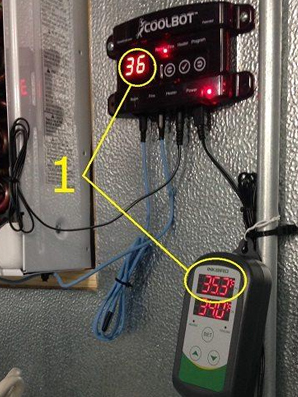
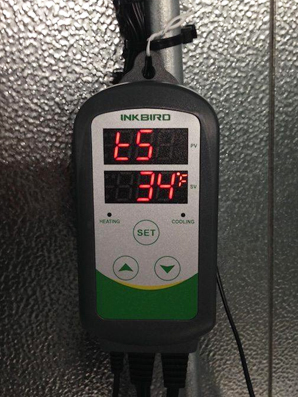
- If all settings are correct, you should be reading on your Inkbird:
- PV : A value within approximately 1°F degree of the CoolBot display
- SV : 34°F (if set to display in Fahrenheit scale)
- 2°F (if set to display in Fahrenheit scale) when pressing the UP arrow (heating differential set value)
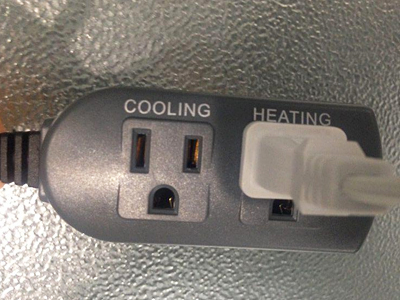
- Plug your heater into the receptacle labeled HEATING on the Inkbird plug-in cord. Leave the socket labeled COOLING of the Inkbird empty (DO NOT plug your CoolBot or your A/C into it!)
- Turn ON your heater and set the Heat level to Low.
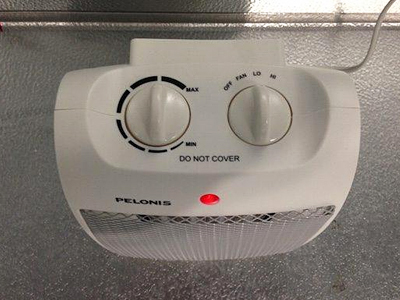
NOTE: These are efficient heaters; a small heater can handle large rooms. As a general rule, you need a heater that has (Area x 10) in Watts power. For example, a 100-ft2 room would require a 1000W heater. If your heater has a capacity of 1200W or 1500W, run your heater on Medium or Low (DO NOT RUN ON HIGH, as the InkBird cord will not be able to handle the load of the Heater).
YOU'RE SET UP! Check the system for operation, to make sure it is performing as expected. Make the necessary adjustments if needed.
Adapted with permission from the manufacturer; images illustrating set-up steps are courtesy of the manufacturer. All rights reserved.
More CoolBot Resources
- CoolBot – Air Conditioner Compatibility • Use, Temperature, Cooler Size & Insulation + Brand Recommendations Tech Sheet PDF
- CoolBot • How to Build a Walk-in Cooler for Your Small Farm 27-pp PDF
- CoolBot • Instruction Manual & Troubleshooting Guide 20-pp PDF
- CoolBot • Quick-Start Guide Tech Sheet PDF
- CoolBotPro • Instruction Manual & Troubleshooting Guide 26-pp PDF
- CoolBot Pro • Quick-Start Guide Tech Sheet PDF
- CoolBot Pro • Spec Sheet PDF