
- Video: Planting Sweet Potatoes | Tutorial from Johnny's Selected Seeds
- Unboxing and Caring for Your Sweet Potato Slips
- Tips for Starting Your Sweet Potato Slips
- Video: Rooted Knowledge: Sweet Potatoes from Slip to Storage | Webinar Recording
- Classic Storage Crops | Post-Harvest Handling & Storage Guidelines
- Webinar Slide Deck | Rooted Knowledge: Sweet Potatoes from Slip to Storage | PDF
- Sweet Potatoes | Key Growing Information
- Sweet Potatoes | Instructions for Growing from Slips | Tech Sheet (PDF)
- Rooted Knowledge: Sweet Potatoes from Slip to Storage | Johnny's Webinar Series
Starting Tips for Your Sweet Potato Slips
The slips ship in a dormant state and may appear discolored, wilted, or with dead, dry leaves. No cause for alarm; they will grow vigorously once established.
Although native to the American tropics, sweet potatoes are an important crop that is grown globally in diverse ecologies. Even though they are extremely frost-sensitive, they can be grown successfully from slips in cooler climates, provided a few key conditions are met.
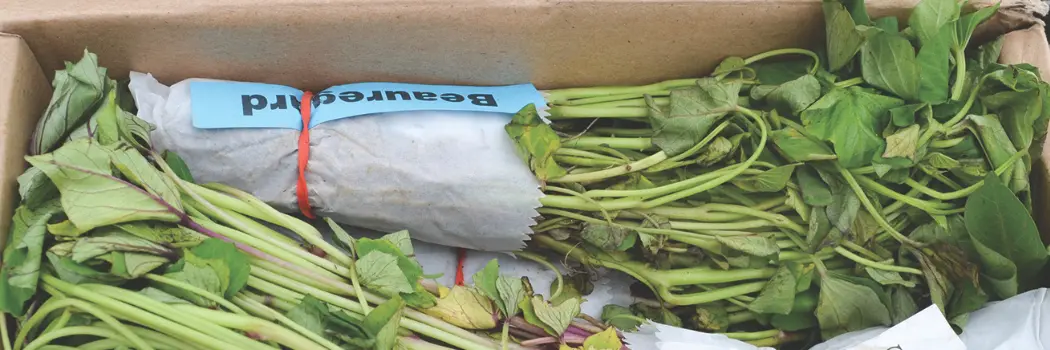
Here at Johnny's, orders of sweet potato slips ship at a steady clip in the springtime. The slips are shoots that have been sprouted from seed stock roots. If you have never grown sweet potatoes from slips before, here's a set of illustrated steps to help ensure your crop takes off from the get-go. We explain how to hold them over until you are able to plant, then walk you through bed prep, dibbling in the slips, and adding a layer of protective row cover for this heat-loving crop. Photos from trials at our Research Farm (zone 5b) illustrate what to expect and do, to set yourself up for the best yield possible come fall.
Arrival & Pre-planting Care
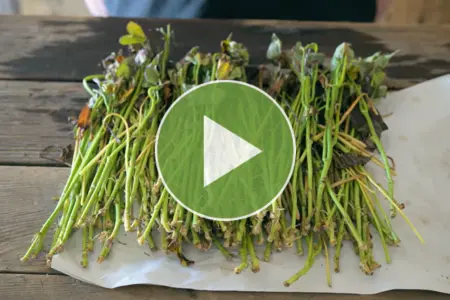
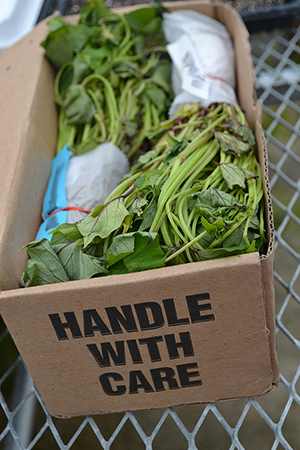
Watch our video on unboxing and caring for your sweet potato slips. Learn what to expect and how to hold the slips over (if necessary) before planting.
With any shipment of live plants, the general rule is to plant them in their final spot as soon as possible. But in the case of sweet potatoes, it is crucial to wait to plant until the soil has warmed to 60–65°F/16–18°C.
If you're held back from planting right away, here's how to keep your sweet potato slips healthy until you can get them in the ground.
First of all, open the box as soon as it arrives. The rigors of packing and shipping can leave live plant material looking the worse for wear. The slips may look like nothing more than sticks. Some of the leaves may be pale, wilted, dried up, or even dead. There may be absolutely no leaves. But this is not usually cause for alarm—plant tissue can be significantly more resilient than outward appearances might suggest.

There may be considerable variation in the size and appearance of the slips, but they will all grow if provided favorable conditions.
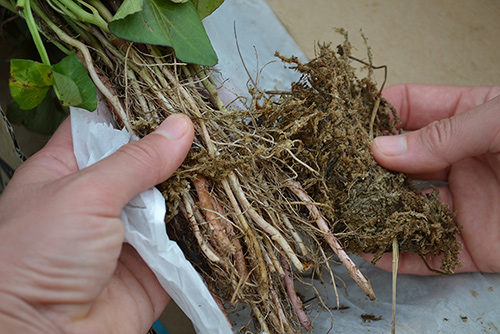
There can be variation between the slips in length and diameter, as well as in the extent of the finer fibrous white roots that may be growing off of them. This, too, is normal—both for different varieties and the same variety. Some slips will have no fibrous roots, some will have many, some will have brand new, bright-white fibrous roots sprouting from the nodes. A lack of roots is not going to negatively impact yield or viability.
They will all grow if planted in a favorable environment. Many commercial sweet potato growers, who plant thousands of acres each year, prefer to plant bare-root slips. There are fewer variables when the tissue is bare; the process is cleaner, and avoids transfer of soil from farm to farm.
Holding Your Slips for a Day or Two
If planting must be delayed, wrap the root end in moist paper towels, keeping any leaves that are present and stems above the root nodes dry; place upright and keep at room temperature, out of direct sunlight and wind.
Protect the slips from direct sunlight, and prop them upright. We stick each bundle in a glass or jar if we expect to be planting them within a day or so.
Soak the root ends in water for just 1 hour per day—any longer can induce rot.
Being native to the tropics, sweet potato slips do not fare well when held at temperatures below 60°F/16°C. It's best to keep them at around room temperature—generally taken to be about 70°F/21°F.
Holding Your Slips for More Than a Couple Days
If you need to hold your slips for more than a couple days, here's what to do.
Gently remove the peat moss packing and loosen the individual slips.
After opening the box, lift out the bundle and gently loosen and separate the roots from one another, discarding any peat moss that may have been wrapped around the roots before the plants were shipped.
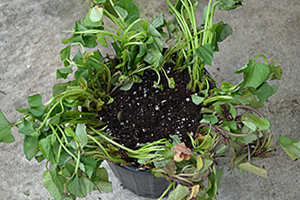
Arrange the slips around the perimeter of a clean container filled with potting mix.
Fill a clean plant pot halfway with potting mix or other sterile planting medium. Arrange the slips loosely around the perimeter of the container, then fill the container to the top with additional potting mix.
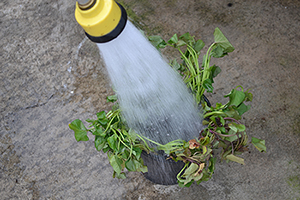
Gently water them in and add more medium if needed to cover the roots.
Water the slips in to bring the roots into contact with the potting medium, and add more medium if needed. If the slips have fibrous roots, it's important to be sure they are well-covered by the potting mix.
Store the slips at room temperature, out of direct sunlight. We placed ours underneath an occupied greenhouse bench.
If you are holding more than one sweet potato variety, be sure to keep the varieties separate and label containers accordingly.
Keep the containers moist. In just a day or two, the plants will begin to flourish with bright, healthy leaves. Rest assured that in the days between their arrival and the day of planting, your sweet potatoes slips will have recuperated, and will indeed look great!
Site Selection & Bed Preparation
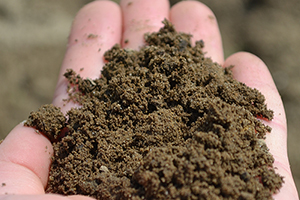
Well-drained soil with an ideal "crumb" for sweet potato plantings.
A key basis for success with any field-grown crop is that it is well-matched to the soil type. With sweet potatoes, the ideal is a well-drained, sandy loam with a pH of around 6.5. High fertility is not necessary; loose sandy soils help produce uniform roots.
Equally important is that the soil needs to be warm for this tropical native. Allow the soil to warm to between 60–70°F/18–21°C before planting. Most varieties require 90–120 frost-free days. Cool temperatures or poorly drained soils can damage young plants and vines and cause slips to rot.
For our trials here in Central Maine, we lay black plastic mulch along the entire length of our bed as an economical way to both warm the soil and suppress weeds. For maximum soil warming with weed suppression, you can also use solar mulch.
Underneath the mulch we run a line of tubing to allow for drip irrigation when needed, later in the season.
Black or solar mulch can be laid to warm the soil and suppress weeds. Measure to ensure transplants are equidistant. Use a dibble to puncture holes in the mulch.
If you're planning to put in a large crop of sweet potatoes, a transplanting tractor can save you considerable time.
Growing in Raised Beds
Raised beds (ideally 6–8" tall) are a good option for sweet potatoes and can be used to help achieve ideal soil type, improve soil warmth, and improve drainage. Follow the same plant spacing and irrigation recommendations as provided for field plantings.
Spacing Sweet Potato Slips
Planting sweet potato trials at the Johnny's Research Farm.
Space slips 10–18" apart (wider spacing produces larger roots) in rows spaced 24"–60" apart. On our Research Farm in Zone 5b, we space plants 12" apart in rows 24" apart, with 2 rows per bed (each bed 6' apart center to center).
There has been some research to evaluate the effects of different in-row plant spacing and other factors on sweet potato yield. You can also check with your local extension agency for recommendations tailored to your regional conditions.
Planting Sweet Potatoes
With the field stakes in place and the mulch holes punctured, it's time to begin planting.
Remove slips from containers carefully. A robust root system is already developing.
If you've potted up your slips to hold them over for a while, remove them from their container as you would with any transplant. Then, gently tease apart the slips to separate them individually. Even during a relatively short holding period, they will have begun to develop a more robust root system.
If the forecast is for hot, dry, and/or windy conditions for the first 3–5 days after planting, we recommend pruning all leaves off the slips prior to planting to help the plants retain moisture.
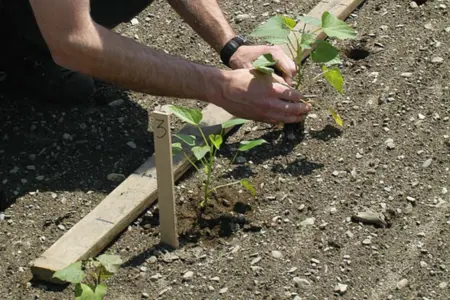
The next step is to create a hole in the soil deep enough to accommodate each slip, one by one, as they can vary in length. Plant slips either sideways or straight down in the soil, ensuring that 2-4 nodes (growing points) are buried 3–4" deep.
If the slips have a lot of fibrous roots, try to bury them below the soil line. There are various ways to accomplish this, but we find it easiest to use a simple wooden dibble.
Gauge each slip's length and the breadth of its fibrous roots, then drive the dibble down into the soil and rotate it to widen the hole. This will give you a hole approximately correct in size, as simple as that.
Close-up of nodes, one on a slip with fibrous roots and the second on a slip with leaf material. In either case, burying at least 2 nodes below the soil line will help optimize yield.
Place just one slip in each hole, with at least 4–6" of its root end buried. If you do find that some of the slips are too long to dibble a hole of sufficient depth, trim off a bit of excess root from the bottom.
Because the top growing point of the slip may not be present, it may or may not be obvious which end of the slip is the root end. Indicators of the root end include greater thickness and the presence of nodes that tend to root-out first. The bottom end can also be identified as the direction opposite to that in which any leaf petioles may be growing.
With the slip in the hole, gently push the surrounding soil back into the hole.
Water thoroughly immediately after planting.
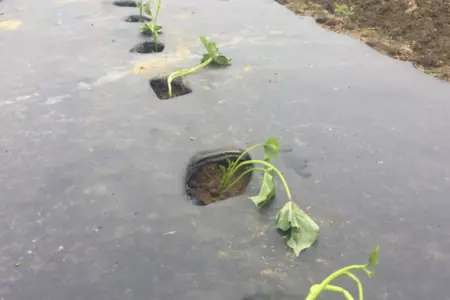
Slips may look droopy. Transplanting can be quite a shock! With time and warming temperatures, however, the transplants will perk up. A layer of row cover can act as a protective, warming blanket.
The plants may look droopy or wilted from the whole process. Transplanting can cause shock to any type of plant. Heat, windy conditions—even a light breeze—can present additional stress, mechanical in nature as well as by increasing the plants' rate of respiration. Focus on keeping the bed watered and give your plants time to re-establish themselves.
Often times the existing slip foliage will wither and die back, but new foliage will emerge. It can take up to one month before the plants really get growing here in Maine, especially if the weather is cool and overcast. If concerned about progress, and you are not seeing any signs, gently dig around the crown of a slip and look for newly formed roots. The root growth will indicate strong or weak growth far before the foliage will.
Irrigation
Keep the bed moistened prior to planting and during the planting process.
It is critical to thoroughly water the slips around the stems immediately after planting and regularly thereafter until the plants are established. This can take a week or more. The slips can dry out very quickly, especially when it is sunny, windy, or dry.
Cease irrigation 3 weeks prior to harvest to prevent tubers from cracking.
Row Cover: An Added Layer of Protection
Northern growers can optionally apply row cover for the first several weeks after planting, and again in the fall before harvest, to extend the season by creating a warmer growing environment. Row cover is generally not required, however; and we do not use row cover in our Zone 5b trials.
Harvest, Curing & Storage
Dig roots in fall before any hard frosts occur. If plants sustain frost, harvest roots as soon as possible—frost damage will travel downward from the foliage and stem to affect the roots. Cut back vines by hand or with a flail mower, then dig roots by hand with a spading fork or mechanically with a bed lifter. Dig and handle carefully to avoid injuring the skins. Heavy and dry soil increases risk of damage to roots. Late varieties tend to have thinner skin that is more susceptible to skinning damage than earlier varieties.
Sweet potatoes must be cured before storing to toughen skins and improve eating quality. Brush loose soil from the roots and cure in a warm (85°F/29°C), dark, well-ventilated location with 85% relative humidity for 4–7 days. After curing, store in a cool (60°F/16°C), dark location and avoid any unnecessary handling. Do not allow the storage temperature to drop below 50°F/10°C, as this will injure the roots. Prior to eating, store the roots for an additional 3–4 weeks following curing to encourage full sugar development. Properly handled roots can be stored for 7 months or more.
Pests: Critters Love Sweet Potatoes
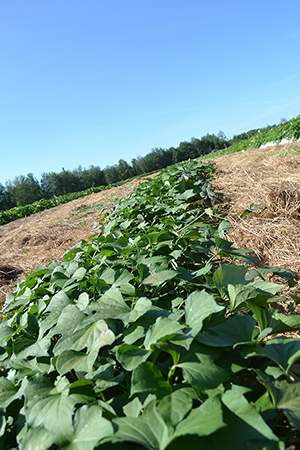
Sweet potato trial, Albion, Maine. Photos taken July 17th.
Sweet potato leaves are high in protein (ranging from 25–30%, similar to legumes), so if you have deer in your area, take note that they love sweet potato leaves and vines. Rabbits, too, enjoy them, and will slice the shoots clean off with their sharp incisors. If you don't have a fence, a layer of row cover can deter them from feeding on the plants. Voles also have a penchant for the tender young shoots of sweet potatoes and if unchecked can make quick work of the entire crop. Keep the garden edges clean and well-mowed to help deter voles; you can also install ¼" or smaller mesh fencing around the garden to protect the entire area. Plantskydd, a granular repellent approved for use in organic production, comes in a range of sizes and formulations that can be applied to discourage problematic critters such as deer, rabbits, mice, and voles.
Sweet Potatos vs. Yams
Bessey's cactus
"I yam what I yam…"
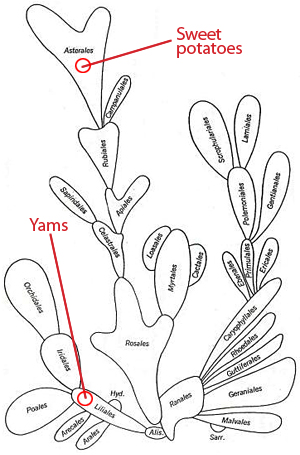
Many different plants around the world are referred to as yams, most notably the sweet potato, but these two crops are from widely divergent plant families. While they share some physical features and produce starchy tubers that serve similar roles in the human diet, true yams are monocots—more closely related to grasses and flowering bulbs than to sweet potatoes, which are dicots.
A branching, treelike diagram known as a cladogram (after klä'-dos, Greek for slip, shoot, or arm) can be used to depict speciation relationships like this one. Back when scientists could only compare different species by scrutinizing their anatomy, the 19th–20th-century botanist Charles Bessey developed and illustrated a classification system that came to be known as Bessey's cactus. In this system, the true yam family is found toward the base of the lower-left branch, with the monocots, while that of the sweet potatoes is situated at the tiptop of the central dicot branch.
The tree of plant life has had its branches rearranged considerably since Bessey's day, as evolutionary biologists nowadays analyze genetic material and evaluate photosynthetic pathways to better interpret taxonomic relationships between different plants. Their findings can be of interest to plant breeders seeking to develop varieties that are more nutritious or better adapted to thrive in diverse and harsh environments.
Anyway you slice them and whatever you like to call them, we encourage you to try one or more of our varieties and let us know how they perform for you.
Learn More
Growing Resources from Johnny's
- Sweet Potatos • Key Growing Information
- Sweet Potato Production • Tech Sheet (PDF)
- Storage Crop Post-Harvest Handling & Storage Guidelines • Article
- Rooted Knowledge: Sweet Potatoes from Slips to Storage • Webinar Resources
References & Further Reading
- Growing Sweetpotatoes in New Hampshire • University of New Hampshire Cooperative Extension.
- Ipomoea batatas (L.) Lam. • Purdue University Center for New Crops & Plants Products.
- Optimizing Sweetpotato Production. • SUMMARY: ScienceDaily.
- Optimizing Sweetpotato Production for Fresh and Processing Markets through Plant Spacing and Planting-harvest Time. • FULL REFERENCE: HortTechnology.
- The Phylogenetic Taxonomy of Flowering Plants. • Annals of the Missouri Botanical Garden.
- The Sweetpotato: An up-to-date publication with emphasis on propagation technologies, pests and diseases, curing and storage. • Springer Netherlands.
- Taxonomy of Flowering Plants. • W. H. Freeman & Co.