
- Video: Mild Micro Mix | Exclusively from Johnny's
- Microgreens Yield Data Trial | Summary, Materials & Methods, Findings & Discussion
- Microgreens Yield Data Trial | Table of RAW DATA (XLSX)
- Microgreens Yield Data Trial | Table of Averages for Each Variety | Tech Sheet (PDF)
- Costs & Materials Calculator | Microgreens & Seedling Bench for High Tunnel Installation
- Growing Microgreens Year-Round for Profit | Johnny's Selected Seeds
- Microgreens Production Fundamentals | Johnny's Webinar Series
- Microgreens | Key Growing Information
- Growing Microgreens at Home With Niki Jabbour
- Deluxe LED Microgreens Starter Kit Instructions | Tech Sheet (PDF)
- Video: 'Confetti Radish' Micro Mix | Exclusively from Johnny's
- Microgreens Production | Tech Sheet (PDF)
- Webinar Slide Deck | Microgreens Production Fundamentals | PDF
- Video: Microgreens Production & ROI, with Thomas Macy
- 12 Best Microgreens for Beginner Growers | Easy Choices to Get You Started from Johnny's Research Team
- Deluxe Microgreens Starter Kit Instructions | Tech Sheet (PDF)
- Basic Microgreens Starter Kit Instructions | Tech Sheet (PDF)
- Video: 'Rainbow Sprinkles' MicroMix | Exclusively from Johnny's
- Salad Mixes & Microgreens Mixes | 2-pp Spec Sheet (PDF)
- Microgreens Comparison Chart (PDF)
- Microgreens Brochure | An Overview of Growing, Harvesting & Marketing Basics | Printable 4-pp PDF
- Video: Microgreens Production Fundamentals | Webinar Recording
Year-Round Microgreens Production for Profit
Recommendations from Johnny's Research Team
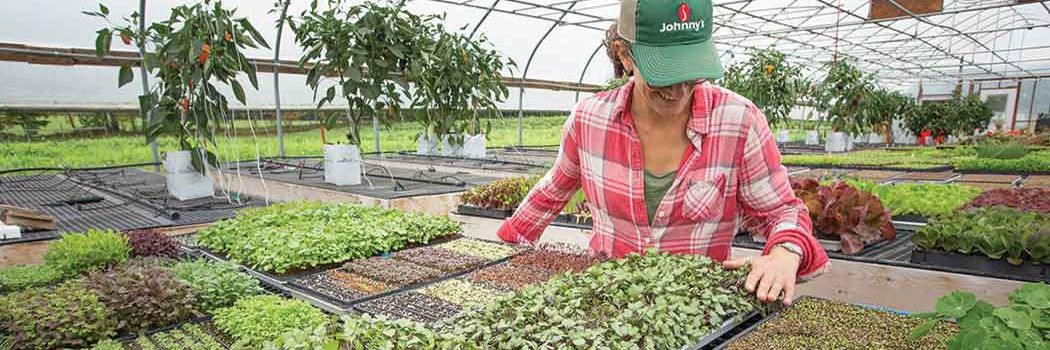
Starting or expanding a microgreens business offers a grower the opportunity to leverage existing markets and open new ones. Microgreens varieties can be marketed profitably as individual components or in signature blends, combining different flavors, colors, and textures. They can be quickly produced year-round, even at high latitudes through the depths of winter, with supplemental heat and lighting. In addition to their versatility and potential profitability, microgreens are nutrient-dense, intensely flavorful, and simply beautiful.
While microgreens are relatively easy and quick to grow, and start-up costs relatively low, commercial success depends on knowing some important points up front. This guide will help you on your way with planning considerations; the basics of seed selection, sowing, growing, and harvesting; and recommendations for marketing this profitable, year-round specialty crop.
1 • Planning
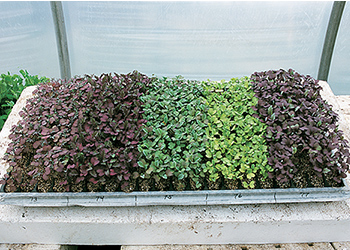
20-Row tray of 5 varieties, selected for their similar growth rate, plus a range of colors, flavors, and textures
Sowing dates can be coordinated to produce a mix of varieties, all ready for harvest at once, at ideal size.
View Our Microgreens Comparison Chart
View Our Microgreens Comparison Chart
Seed Selection
You may want to start with a few straightforward varieties, or with a professionally premixed selection of microgreens, then diversify later on. Johnny's offers five premixed options:
- Mild Micro Mix, a balanced combination of mild brassicas.
- Spicy Micro Mix, a complement of sharper-tasting varieties.
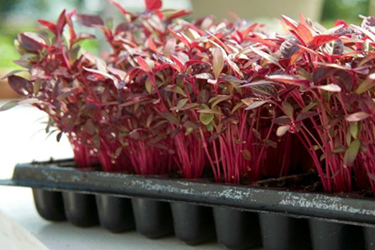
- Rainbow Sprinkles Micro Mix, a make-a-splash recipe of chard and beets in a rainbow of stem, leaf, and midvein colors.
- Confetti Radish Micro Mix, an easy, fast, and colorful formulation.
- Kalefetti Micro Mix, vivid kale colors in a variety of leaf types and textures.
Our mixes are precisely formulated to produce a range of colors, flavors, and textures with excellent loft and compatible growth rates.
Microgreens have a quick turnaround time, but there are differences in growth rate between different types and varieties. The majority of vegetable varieties grown as microgreens are ready for harvest in about 2 weeks, though the brassicas mustard and radish have a faster growth rate and therefore mature faster than beets, carrots, or chard. Herbs grown as microgreens tend to be comparatively slow-growing, maturing in 16–25 days. Depending upon types, varieties, and environmental conditions, a production cycle can be prolonged up to 4 weeks and beyond.
Use our Microgreens Comparison Chart to become more familiar with the fast-growing and slow-growing groups, along with other distinguishing features, and to help you choose varieties to grow concurrently. With practice, sowing times can be coordinated to produce a mix of varieties, all ready for harvest at once, at optimal size and flavor.
To approximate the seed quantities that you will need, you will need to consider seeding density, a relationship we cover in more detail below, under Sowing. Another part of forecasting how much seed you will need involves approximating the quantity of product that you need to harvest to meet your market demand. To help you compare seed quantities to sow versus potential yield during the planning phase, we created a tech sheet detailing the results of our Microgreens Yield Trial (Averages) for 29 Popular Varieties. With some trialing, good record-keeping, and repetition, a grower can become adept at estimating seed requirements versus project yield, timing production cycles, and forecasting ROI.
Growing Microgreens Indoors or Under Cover: Supplies & Space
Due to the fragile nature of the product, microgreens are most often grown indoors, in greenhouses or other protective structures. Adequate temperatures, ventilation, and light are important and require additional attention and resources. Before you construct your microgreen set-up, calculate how much space you have or will need, and gather together a few supplies—many of which you may already have on hand:
- Growing medium. such as potting mix, or soilless media designed specifically for microgreens production. For potting mix, we recommend Johnny's 512 Mix, Johnny’s Germination Mix, or Vermont Compost Fort Light Mix. To reduce the risk of soilborne disease, do not use a potting mix that includes unfinished compost. For soilless media, we offer hemp grow mats.
- Microgreen trays. Microgreens are often sown into standard 1020 flats or 20-row seed flats filled with a light, sterile, soilless mix to a depth of 1½–2".
- Tray covers. Options for covering the seeds after sowing include paper towels, vermiculite, domed lids, or white plastic trays.
- Heat mats. Available in a range of sizes and materials, with daisy-chaining, timer, and monitoring features, heat mats can help provide consistent root-zone temperatures.
- Grow lights. Supplemental light is essential at during off-season production at most latitudes and/or when growing indoors.
- Circulation fans. Adequate ventilation is essential for disease prevention.
- Table space. Raised platforms, tables, or hanging benches help keep plants safe and provide for ergonomics.
With their short crop cycles and minimal to no fertility requirements, microgreens are an excellent crop for hydroponic culture. See Introduction to Hydroponic Growing to learn more about systems and equipment for this production method.
2 • Sowing
Seeding at appropriate density ensures maximum germination, quality and yield.
Seed at Appropriate Density
When getting ready to sow, take seed size into account, as this will determine the best method of planting. Sifters and colanders can be used to help to sort seeds by size. Seeding densities should be thick enough to cover the flat, but not to the point of inhibiting air flow. Both small and large seeds should be sown thickly (⅛–¼" apart), then gently tamped into the growing medium.
- Small seeds: 10–12 seeds/in2
- Medium to large seeds: 6–8 seeds/in2
Seeding too densely can result in lack of air circulation, setting the stage for increased risk of disease.
Cover & Water In
Once the flats are sown, small seeds can be covered with a layer of paper towels, finely sifted vermiculite, or a small amount of soilless mix. Large seeds should be covered with a light layer of the grow mix. Water them gently to avoid washing away the seeds. Then cover the flats with either a clear or white plastic dome to retain humidity and aid in germination. If using a tray or dome, be careful to remove the cover or ventilate during sunny, warm conditions; otherwise, the temperature may rise too much and inhibit germination. If using paper towels, they should be kept moist and can be gently removed in just a few days. Most of the seed coats will be removed with the towel, which is helpful when it comes time to wash the final product.
3 • Growing & Care
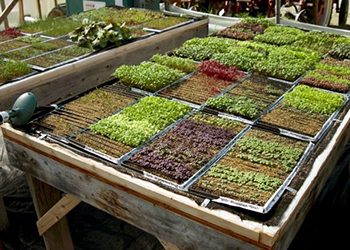
Simple waist-high tabletop setup
Use our Cost & Materials Calculator and Construction Guide to build yourself a versatile Hanging Microgreens & Seedling Bench for your greenhouse, hoophouse, or high tunnel.
Cost & Materials Calculator (XLSX) …
Construction Guide (PDF)…
Cost & Materials Calculator (XLSX) …
Construction Guide (PDF)…
Temperature Recommendations
- Growing medium temperature. Ideal substrate temperatures for germination and growth is dictated by the specific needs of each variety, with different considerations for heat-loving crops like basil than for cooler-loving brassicas. Consult the Growing Information on each product page for ideal pre- and post-germination substrate temperatures.
- Ambient temperatures. While optimal ambient temperatures are also variety-specific, a range of 65–75°F (18–24C°) is generally a favorable one. Temperatures above 75°F (24°C) can increase disease pressure and inhibit germination in some varieties.
Moderate nighttime dips are acceptable, but steady, higher temperatures encourage full-speed production.
Humidity & Circulation
Sufficient air circulation can be provided with fans to prevent pest and disease issues. The flats of microgreens need to be kept moist but not overly wet. Some growers use bottom-watering methods to minimize soil splashing, which can also help to produce a cleaner finished product.
Fertility
Do microgreens need fertilizer? It depends on the crop and growing conditions. For growing media that hold some fertility, plain water is usually best. Some growers find that fertilizing is needed to prevent yellowing of the microgreens. A dilute fertilizer solution is appropriate for slow-growing varieties or when growing on media (such as foam or coir sheets) that have no inherent nutrient value. If fertilizing, incorporate the fertilizer into the growing medium before sowing, or use a soluble fertilizer in the mister or bottom-feed water supply. Producers should take care to prevent any "off-flavors" that can at times derive from fish-based production materials.
Lighting
Many plants respond differently to artificial light than they do to natural light. Take note of light duration, wavelength, and intensity, and distance from the crop, factors that will determine the growth rate and quality of your finished product. If the light source is positioned too far from the crop, stretching or legginess may occur. Crop color may appear washed-out when the light intensity is insufficient.
Succession Planting Microgreens
Because of the one-cut nature of microgreens, succession planting is necessary to produce a steady supply of this crop. Sowing dates and quantities of seed sown should be based upon customer demand, delivery schedules, and varietal growth rates. As noted, different varieties grow at different rates. Keep records and modify your system as needed.
Disease Prevention
Because they are planted so densely, microgreens can be prone to disorders, such as damping off, associated with poor air circulation and saturated media. To reduce risk of disease:
- Ensure air movement with horizontal airflow fans.
- Use clean media and water sources.
- Use appropriate seeding density.
- Take care not to over-water.
Tips For Challenging Microgreens Varieties
There are two things that make some varieties more difficult to grow than others.
- Large seed size. Larger seeds have a harder time making good contact with the growing media and need to be pressed firmly into the growing media and covered sufficiently to keep the seeds moist during germination. When seeds are larger there is also an impulse to sow fewer of them, especially for varieties that have multigerm seed, like cilantro, beets, and chard. However, the size of the seed allows for the extra space they might require, and they should still be sown ⅛–¼ inch apart.
- Slower germination rate. With varieties that are slow to germinate, both over- and under-watering can be problematic, so take care to keep flats consistently moist (but not saturated) and ensure good air circulation to minimize disease. For varieties that require warmer temperatures for good germination, providing supplemental heat will also aid in quicker germination.
4 • Harvesting : When & How to Harvest Microgreens
Harvest & handle with care: this high-value crop has a shelf life that matches its micro stature!
Seed-To-Harvest
Microgreens are typically harvested at the first-true-leaf stage of growth, with the cotyledons still attached, or at the seed-leaf stage, at heights varying between 1–2". Gauge readiness using number of days listed for each variety along with appearance and taste. To help you plan ahead and and set appropriate expectations, we have published the results of our Microgreens Yield Trial (Averages) for 29 Popular Varieties, as well as images of each of these 29 varieties at harvest size on their individual product description pages. Again, some trialing and note-taking can be helpful in determining optimal harvest period for your situation.
Harvesting Techniques
One-cut harvesting of microgreens is the current standard practice. While some varieties may regrow under favorable conditions, the quality and yield of that crop may not be marketable. Because much of the weight is in the stem, microgreens sold by weight are usually clipped as close to the stem base as possible without getting the medium in the finished product. Harvest by cutting handfuls with scissors, or cut entire flats with an electric knife. If selling a live product, simply cut the growing medium itself into the desired size.
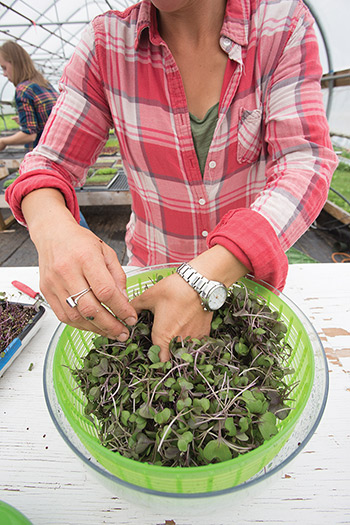
Cut, Wash, Mix, Pack & Cool
Microgreens are a tender, highly perishable crop, and need to be handled with care. Depending on your production methods and market requirements you may opt to grow and sell it as rooted, living product; or to cut the product directly into its final packaging, such as clear plastic clamshells or totes; or to cut it into a salad spinner for mixing and/or washing. Packaging can be selected according to the primary end-users in your market, whether sold in an individual-serving size or in bulk, based on weight or on volume. With their short shelf life, refrigeration is necessary to maintain post-harvest freshness and quality.
5 • Marketing Your Microgreens
Although addressed last in this guide, placing market research at the top of your priorities will benefit your chances of establishing a successful microgreens business.
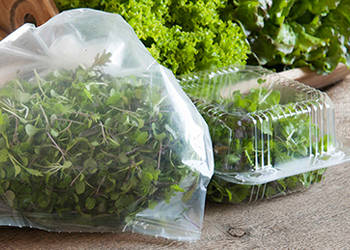
Micros can be brought to market in microperforated food-grade bags, clamshells, or as live product in their growing medium.
Key Marketing Strategies
Here are a few key strategies for getting your microgreens out to customers, so you can complete the cycle and achieve profitability.
- Before you ramp up production, explore your market opportunities and be sure you have a customer base. Contact potential microgreens customers in your projected distribution area—restaurants are the most common channels, but specialty food stores and some farmers' markets may also have demand.
- Plan to produce a few preliminary mixes, or set up an assortment of individual microgreens samples to offer free of charge, to develop your customer base. This approach can also be effective when introducing a new variety or line of produce to established customers.
- Give your brand pizzazz with a one-of-kind mix. First, choose a set of candidates with an interesting complement of colors, flavors, and textures. If you select 5–6 varieties with similar growth rates and cultural requirements, you can combine equal or varying ratios of seed before sowing to produce the mix. If you select varieties with different growth rates and/or cultural requirements, you can seed them on separate days, grow them individually, and have them ready for harvest at the same time, blending them together after harvesting. In either case, be sure to keep detailed records of varieties, seeding dates, and the percentages of each component used, so you can easily duplicate a promising custom mix.
- Finally, if you're not already routinely surveying your buyers and chefs for input and feedback, add that to your checklist, too, so you can modify and improve your product line over time. Customers stay more engaged when offered novel varieties and combinations, especially when confident of the freshness and quality of your product.
Learn More
We wrote this set of guidelines to help you get your microgreens program up and running. For additional information about year-round microgreens production, refer to our Microgreens Library. When produced efficiently and marketed with a dash of flair, microgreens can elevate your operation to a whole new level.
Microgreens Production
- Johnny's Microgreens Brochure Printable 4-pp PDF
- Introduction to Hydroponic Growing Article
- Johnny's Microgreens Production Tech Sheet PDF version of this article
- Microgreens Production Fundamentals Webinar
- Cost & Materials Calculator for a Hanging Microgreens & Seedling Bench XLS
- Construction Guide for a Hanging Microgreens & Seedling Bench PDF
- Microgreens Production Techniques Video
Microgreens Yield Data
- Microgreens Yield Data Trial • Summary, Materials & Methods, Findings & Discussion PDF
- Microgreens Yield Data Trial • Table of RAW DATA XLSX
- Microgreens Yield Data Trial • Comparison Chart of AVERAGES Tech Sheet PDF
Selecting Microgreens Varieties
- Top Picks for Getting Started with Microgreens • 8 Choices to Get You Started Article
- Johnny's Microgreen Varieties Comparison Chart PDF
- Johnny's Vegetable Microgreens Product List
- Johnny's Herb Microgreens Product List
- Johnny's Fast-Growing Microgreens Product List
- Johnny's Slow-Growing Microgreens Product List